Creating a space on a budget is one of my favorite things to do. So, when I was selected to participate in the FrogTape Paint Over Challenge and I knew I had a great product and a total budget of $500 or less – and you know creating on a budget is my jam! I was SO EXCITED to get started!
This post contains affiliate links, please see my disclaimer for details.
I started thinking about what space I wanted to makeover in my home. I decided I wanted to go BIG and really challenge myself. My plan: take a space in our home that was completely unfinished and inspire y’all! I want to reassure you that you CAN completely transform a space on a budget! To challenge myself on this makeover, I decided to go with my son’s playroom in our unfinished basement.
First, let’s see what I started with.

Before photo. Note: before we started a professional painter came in and sprayed black paint on our exposed ceiling.
Since the basement is unfinished, we had no walls dividing the space.
First Things First
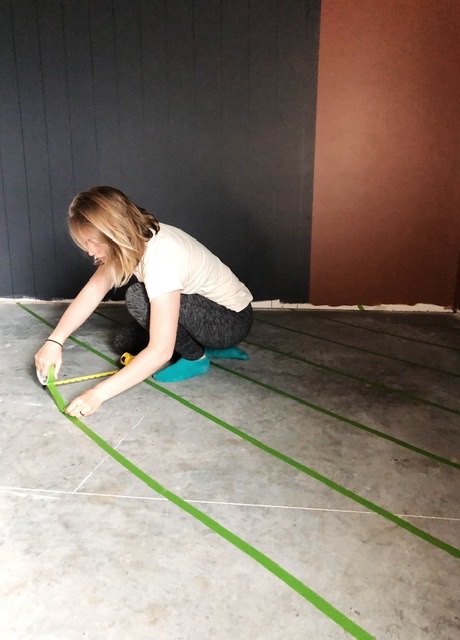
The first thing I did was use FrogTape to map out on the ground the exact space and size that I wanted the room to be. This allowed me to visualize the size of the space and work within that area to design the room. Eventually we will get some walls up down there, but just not quite yet.
FrogTape’s design trend for this challenge was “Rich At Heart”. It was described as “a palette comprised of rich tones with an edge, layering of mixed metals and opulent velvet fabrics. Think art-deco and dramatic.”
As I considered my design trend I started by choosing paint color. And then considered how I wanted to set up the room.
My Sherwin Williams Wall Colors
- Cyberspace
- Pure White
- Canyon Clay
I loved the richness of Cyberspace and Canyon Clay. The way they complimented and worked well together was great too. I decided to use gold accents throughout the space and ended up using Mannered Gold by Sherwin Williams to paint my son’s train table. I wanted the room to be functional for my son and also fit the FrogTape theme. This proved to be challenging at times, and I found myself really having to get creative.

FrogTape for Crisp Lines When Painting
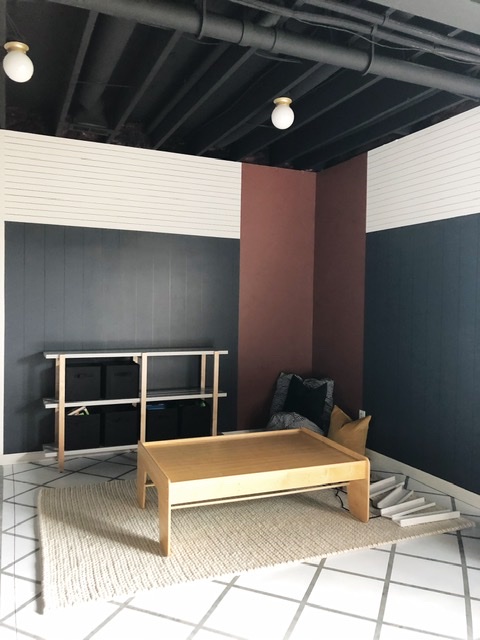
First, I used Cyberspace for the lower bottom half of the wall. And then Pure White on the upper part of the walls. I used FrogTape to get the lines crisp. I have always used FrogTape when completing any kind of color blocking on walls in my home because my lines always come out so crisp with no paint bleeding.
I decided to create a reading corner for my son and used the rich color Canyon Clay for the corner space. I loved the way it created a separate space from the rest of the design and felt like a great dramatic accent.

Don’t Be Afraid Of An Accent Corner (It’s Just Paint – Go For It!)
Next, in true Holly fashion, I used my Sharpie Paint Pen and level to draw straight horizontal lines every two inches. I did this to create a wall like treatment effect on the top part of the wall and then vertical shiplap lines (6 inches apart) on the bottom part of the wall. This allowed the space to have more character without spending the $$ money$$.
Now The Floor
Once I had all my walls painted and the shiplap-like effect, I started on the floor. I went back and forth on using a stencil and paint. Painting it all one color or using FrogTape and paint to create a design. A playroom just calls for a playful design. So I finally decided I was going to go for it and use the FrogTape to create a fun design.
Once I had the design all taped on the floor, I used a white porch paint and a roller to paint over it. I did 2 coats of Behr outdoor porch paint and used the color white.
FrogTape on the Floor For Easy Painting
Once it dried, I peeled off the FrogTape. It was the BEST feeling to see all those crisp lines appear! I was thrilled with the design I had created! The design brought the room together! For the baseboard trim, we used extra paint we had on hand from when our home was built.
Floor design finished! The power of paint and FrogTape!
Decoration
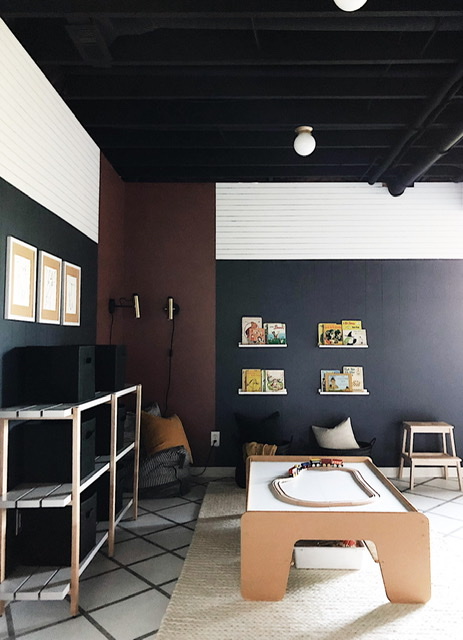
Finally, I had arrived at the last part of this makeover process–decorating! My personal favorite part! I started with painting my son’s train table Mannered Gold by Sherwin Williams. This rich color helped tie in the table with the overall design theme of the room. Next, I hung gold plug in wall sconces (that I already owned) in the reading nook corner. Then I found a plush velvet giant pillow from Amazon for him to sit on. This pillow is so awesome because it actually has a zipper and you can stuff it with whatever you want. This is great for stuffed animal storage and blankets. That’s what you’ll find in ours! I wanted this corner to feel cozy and comfy. The perfect place to read a book.
Lighting Doesn’t Have To Break Your Budget
Then I added 4 book ledges next to this reading corner for book storage. These ledges came in a four pack from Amazon and worked perfect for the space.
I knew I would need more toy storage, so I purchased affordable storage cubes from Amazon. An IKEA shelf that we already owned was the perfect landing place for the cubes.
Sneaky Upgrade
The affordable ceiling lights I snagged on Amazon too. But before installing, for a quick “upgrade” I spray painted the top plate of them gold.
Lastly, I finished the room off with a plush cream colored rug! It is SO SOFT and perfect for little feet! This rug was purchased on RugsUSA and I linked it here for ya!
Lastly, I made some fun DIY art to go above the IKEA shelf. I found a great deal on 3 matching frames from Amazon to showcase the playful art for the walls.

All Done! Thanks, FrogTape!
And that is that! Another awesome and fun makeover done completely on a budget! Overall price for this makeover was $350. Why DIY for $500 when you can save the $150 make it “Rich At Heart” for only $350?! Yay!
“Thank you” to FrogTape for creating amazing products and never letting me down with those crisp paint lines! 😉 FrogTape, you are the best!

A Comfy Space We All Enjoy
I hope this basement playroom DIY inspires you to get creative, think outside the box, and know you CAN transform any space on a budget! It was such an honor and pleasure being chosen to participate in this makeover challenge.
Happy Creating,
Holly
This post was sponsored by FrogTape, but all opinions are my own.
