Another day, another DIY. This one was a lot fun because it was super easy! And it’s something I have wanted to do since moving into our home! When we built our house I had to make a lot of design decisions, and I found myself changing them quite frequently (LOL). Which is pretty much why I ended up with a bathroom floor I did not like. Long story short, in the selection process I changed our cabinet color to a dark color, forgetting the flooring we had already chosen was also dark. This resulted in more dark than I wanted, but by the time it was installed I was pretty eager just to get moved in, so we never changed it. (Enter Mister Floor Stencil)
That being said, I knew I would eventually change it down the road, and I can confidently say I am loving this new look!
Today I am going to share with you how I used Rust-Oleum HOME Floor coating to transform my bathroom floor! Small budget, big impact! LET’S DO THIS!
This post contains affiliate links, please see my disclaimer for details.
MATERIALS
- Krud Kutter (for cleaning floor thoroughly)
- RUST-OLEUM HOME Floor Coating (Step 1 Base Coat, Ultra White Base coat)
- RUST-OLEUM HOME Floor Coating (Step 1 Deep Base Coat, Tinted to Black)
- RUST-OLEUM HOME Floor Coating (Step 2, Matte Clear Top Coat)
- Paint brush and roller
- Painters tape
- Stencil

Alright, lets get down to the details!
Floor Stencil Project STEP 1
Prep those floors! You will need to clean the floor thoroughly using a broom or vacuum and then use Krud Kutter and a cloth/paper towel to scrub the surface down thoroughly. (One nice thing about this paint is you do not need to do any sanding or priming.) It’s really important that you get everything off the floor because you do not want debris in your paint. If you don’t get rid of the dirt and yuck it sticks to the floor. Next, tape off any areas for protection, if needed. I taped off around my dark cabinets since I am usually a very messy painter.
STEP 2
Once your floor is thoroughly cleaned it’s time to start painting! Depending on what you are doing with the design of your floors will determine the color you paint first. I first used the Rust-oleum White Base Coat. I cut in around the walls/cabinets with a brush and then used a small roller to get all the other areas of the floor. Because my floors were so dark before, I did end up doing 3 coats, just to be confident that it was all covered evenly. I waited 6+ hours between coats.
Be sure that you are putting even coats on and not letting the paint puddle up in any areas. I erred on the side of caution and did my coats pretty thin.
NOTE– floors will feel tacky, this does not go away until after you put the top coat sealer on at the end.
Floor Stencil Project: Base Coat
STEP 3
Once you have all your coats done and you have allowed the floor to dry for at least 6 hours, it’s time to start your floor stencil or design (if you choose to do that). I used a very simple diamond design because I knew it would be forgiving. Our floor has texture to it and I knew if I tried to do a very detailed intrinsic stencil design I would have awful bleeding of paint and my lines would not be crisp.

Stencil design: Little Diamonds from Cutting Edge Stencils
TIP- When you stencil, do not use a lot of paint. If you use too much paint you will have a lot of bleeding through your stencil, in other words your lines will not be crisp.
Floor Stencil Project STEP 4
You’re almost done!! This is the last step, woot woot! It’s time to use your brush and roller again, but this time you will be applying a thin coat (or two, if you choose), of the Top Coat or sealer. This is what will (should) protect your floors from chipping and wearing over time. It might be beneficial to do 2 coats of this around areas where you know there will be water or lots of traffic.

Floor Stencil Project: Top Coat
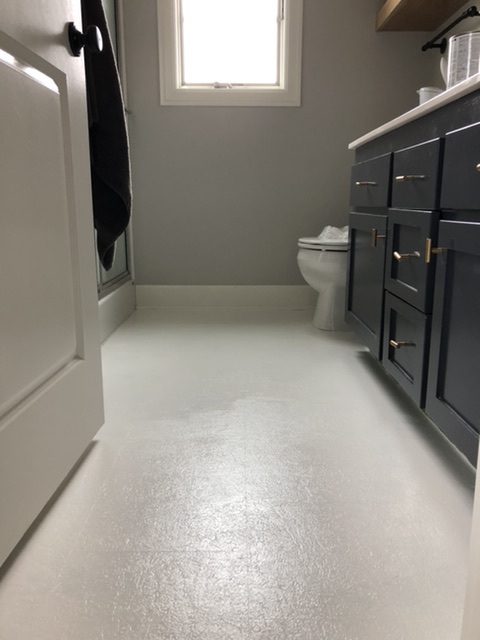
What do you think of the FINISHED product?!! Waiting for the coats to dry did test my patience, but when you know you will enjoy something for years and years a few hours shouldn’t keep you from doing it.

Finished Floor Stencil Project!
This was such a fun and easy floor stencil project that totally transformed our bathroom! It is so much brighter now! I will be sure to keep you posted on how the floor holds up! Be sure to follow me over on IG.
If you have any questions on this process, be sure to leave a comment or send me a DM on Instagram! Thanks for reading!
Happy Creating,
Holly
