Let’s talk WALLPAPER! And I don’t mean the kind your grandmother used that you’re still angrily trying to get off your walls 😂. I’m talking about the wallpaper OF THE FUTURE ya’ll. PEEL and STICK- it’s all the rage right now, and I can see why.
I’m so excited to dive into this post to show y’all how YOU can transform any space in your home without the use of power tools!!
This post includes an affiliate link. Please read my disclaimer for details.
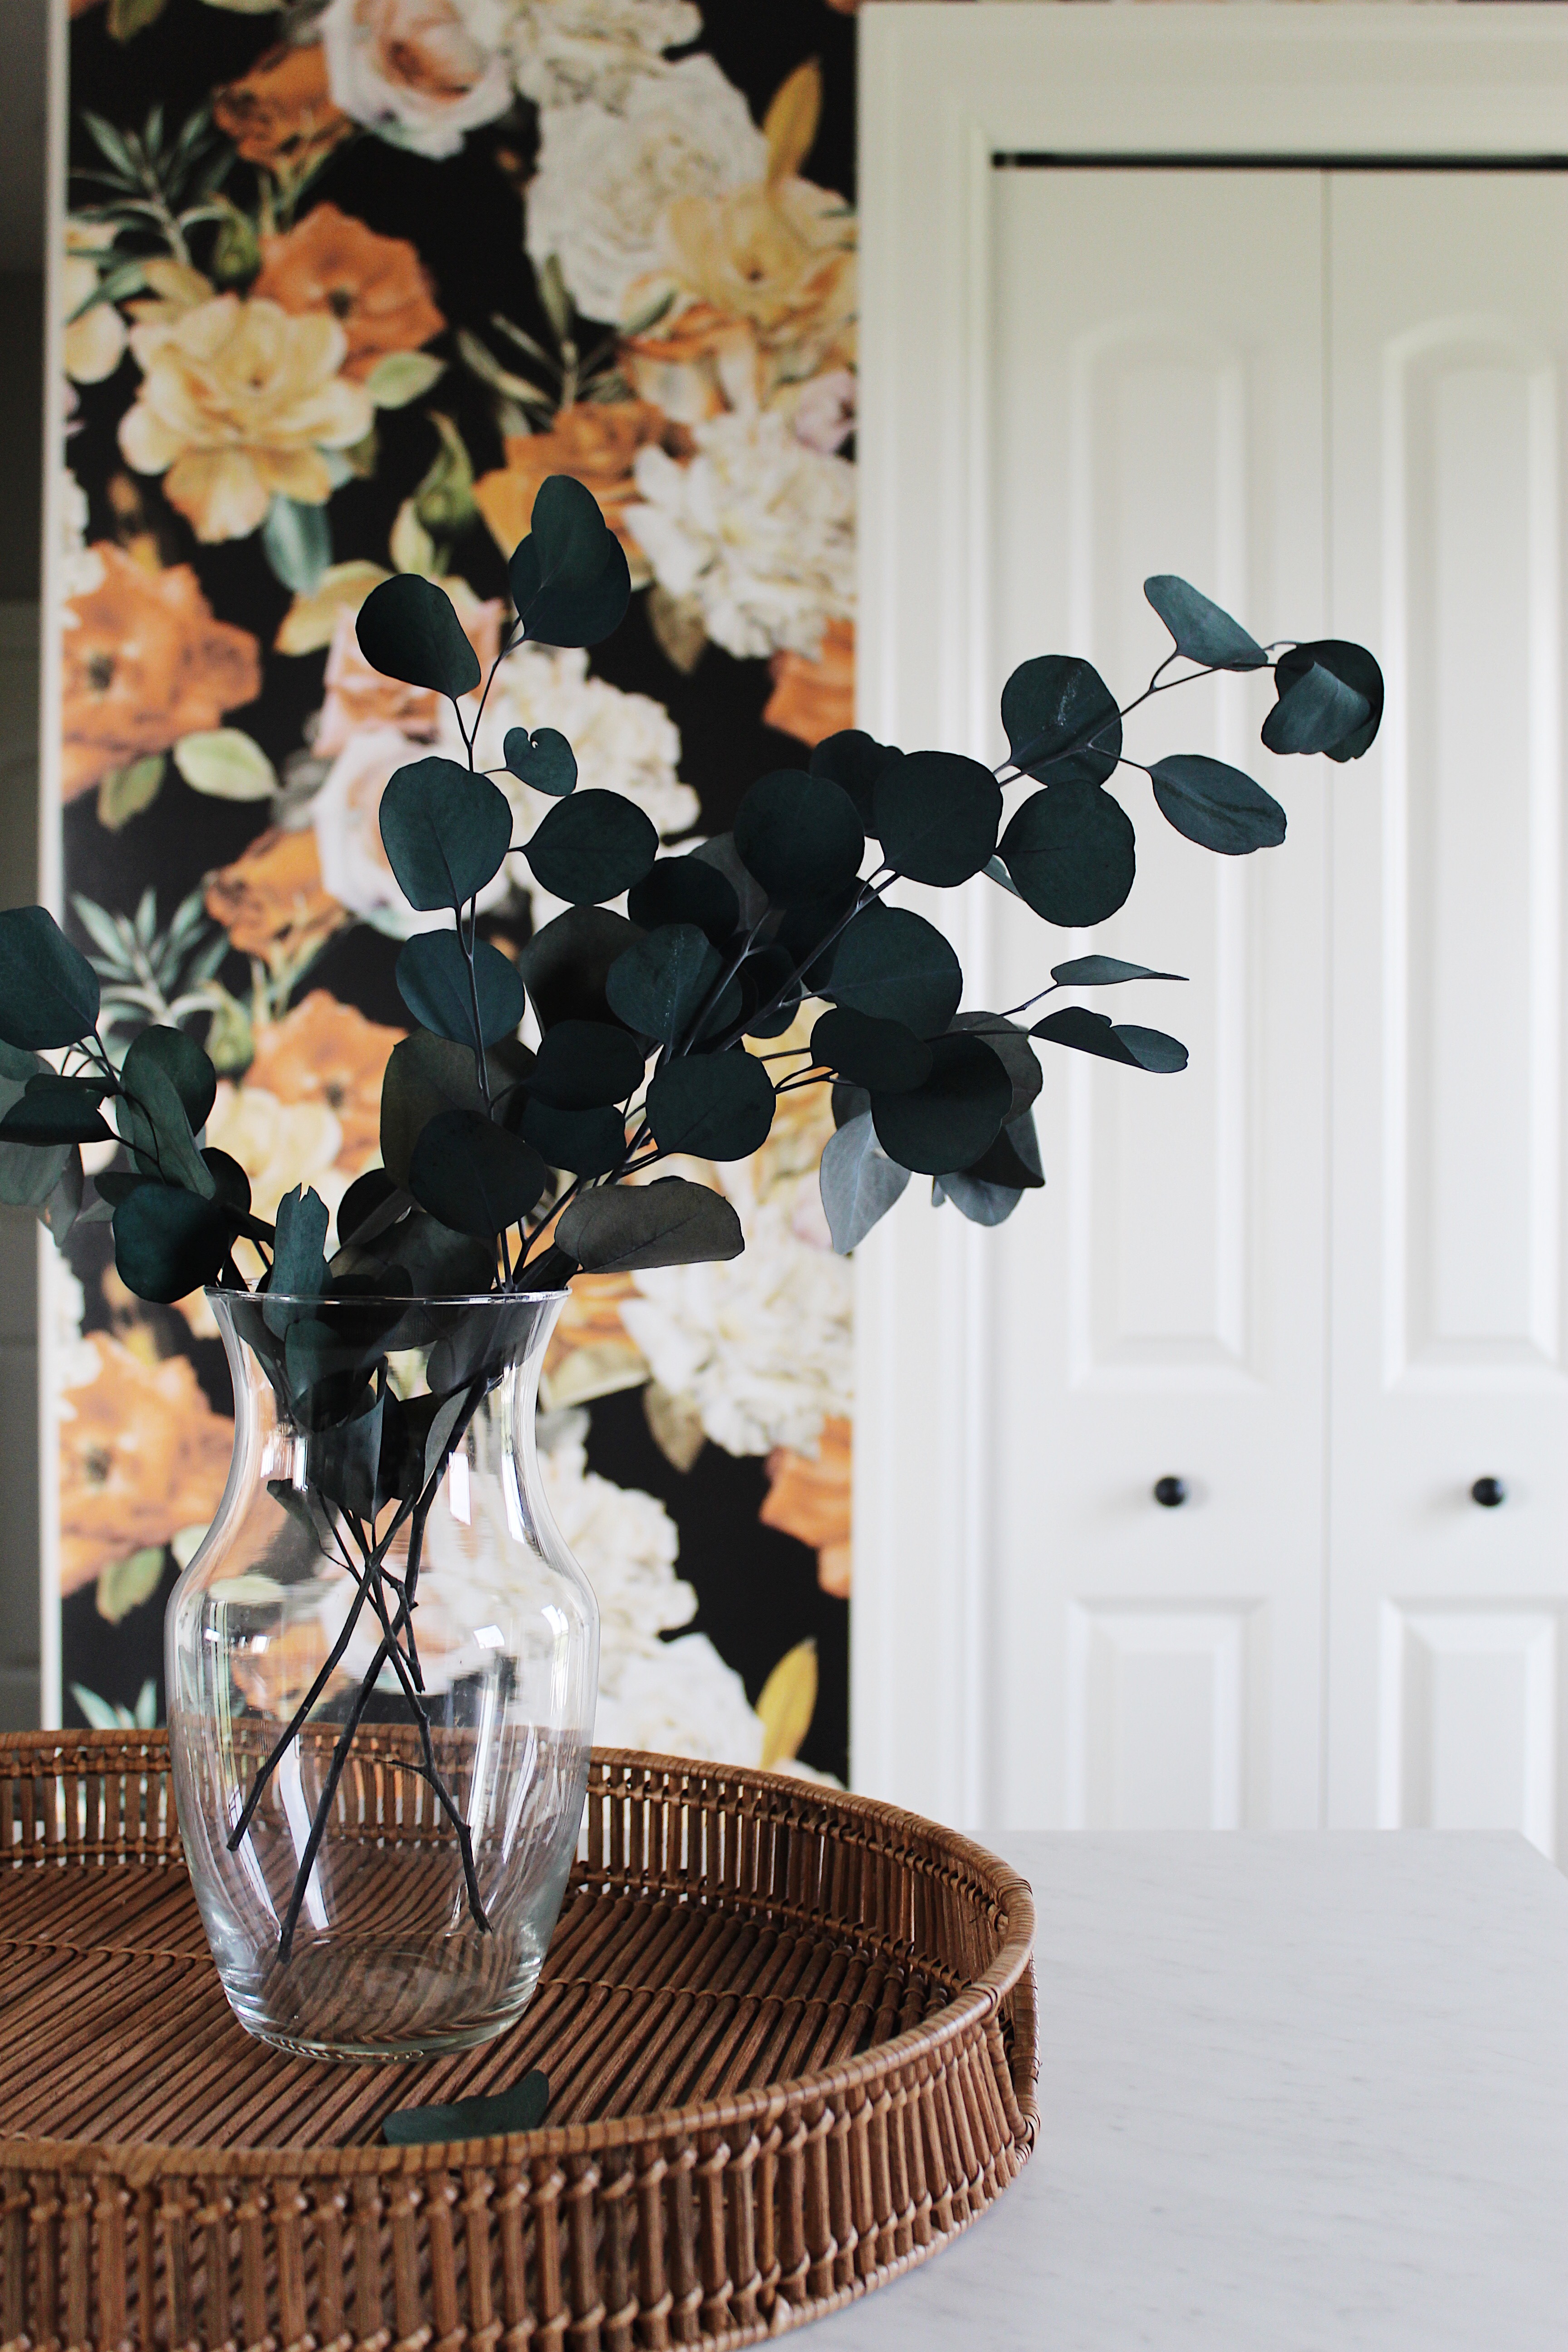
Ok, so now that you’re tuned in, let me tell you where to order. ;). The wallpaper I just installed in my home was from a company called Walls Need Love. And let me tell you, you aren’t going to find better! This stuff is LEGIT! The quality and thickness of the paper leave you with a stunning finish. Plus they have about a zillion designs to choose from. Boo yah!

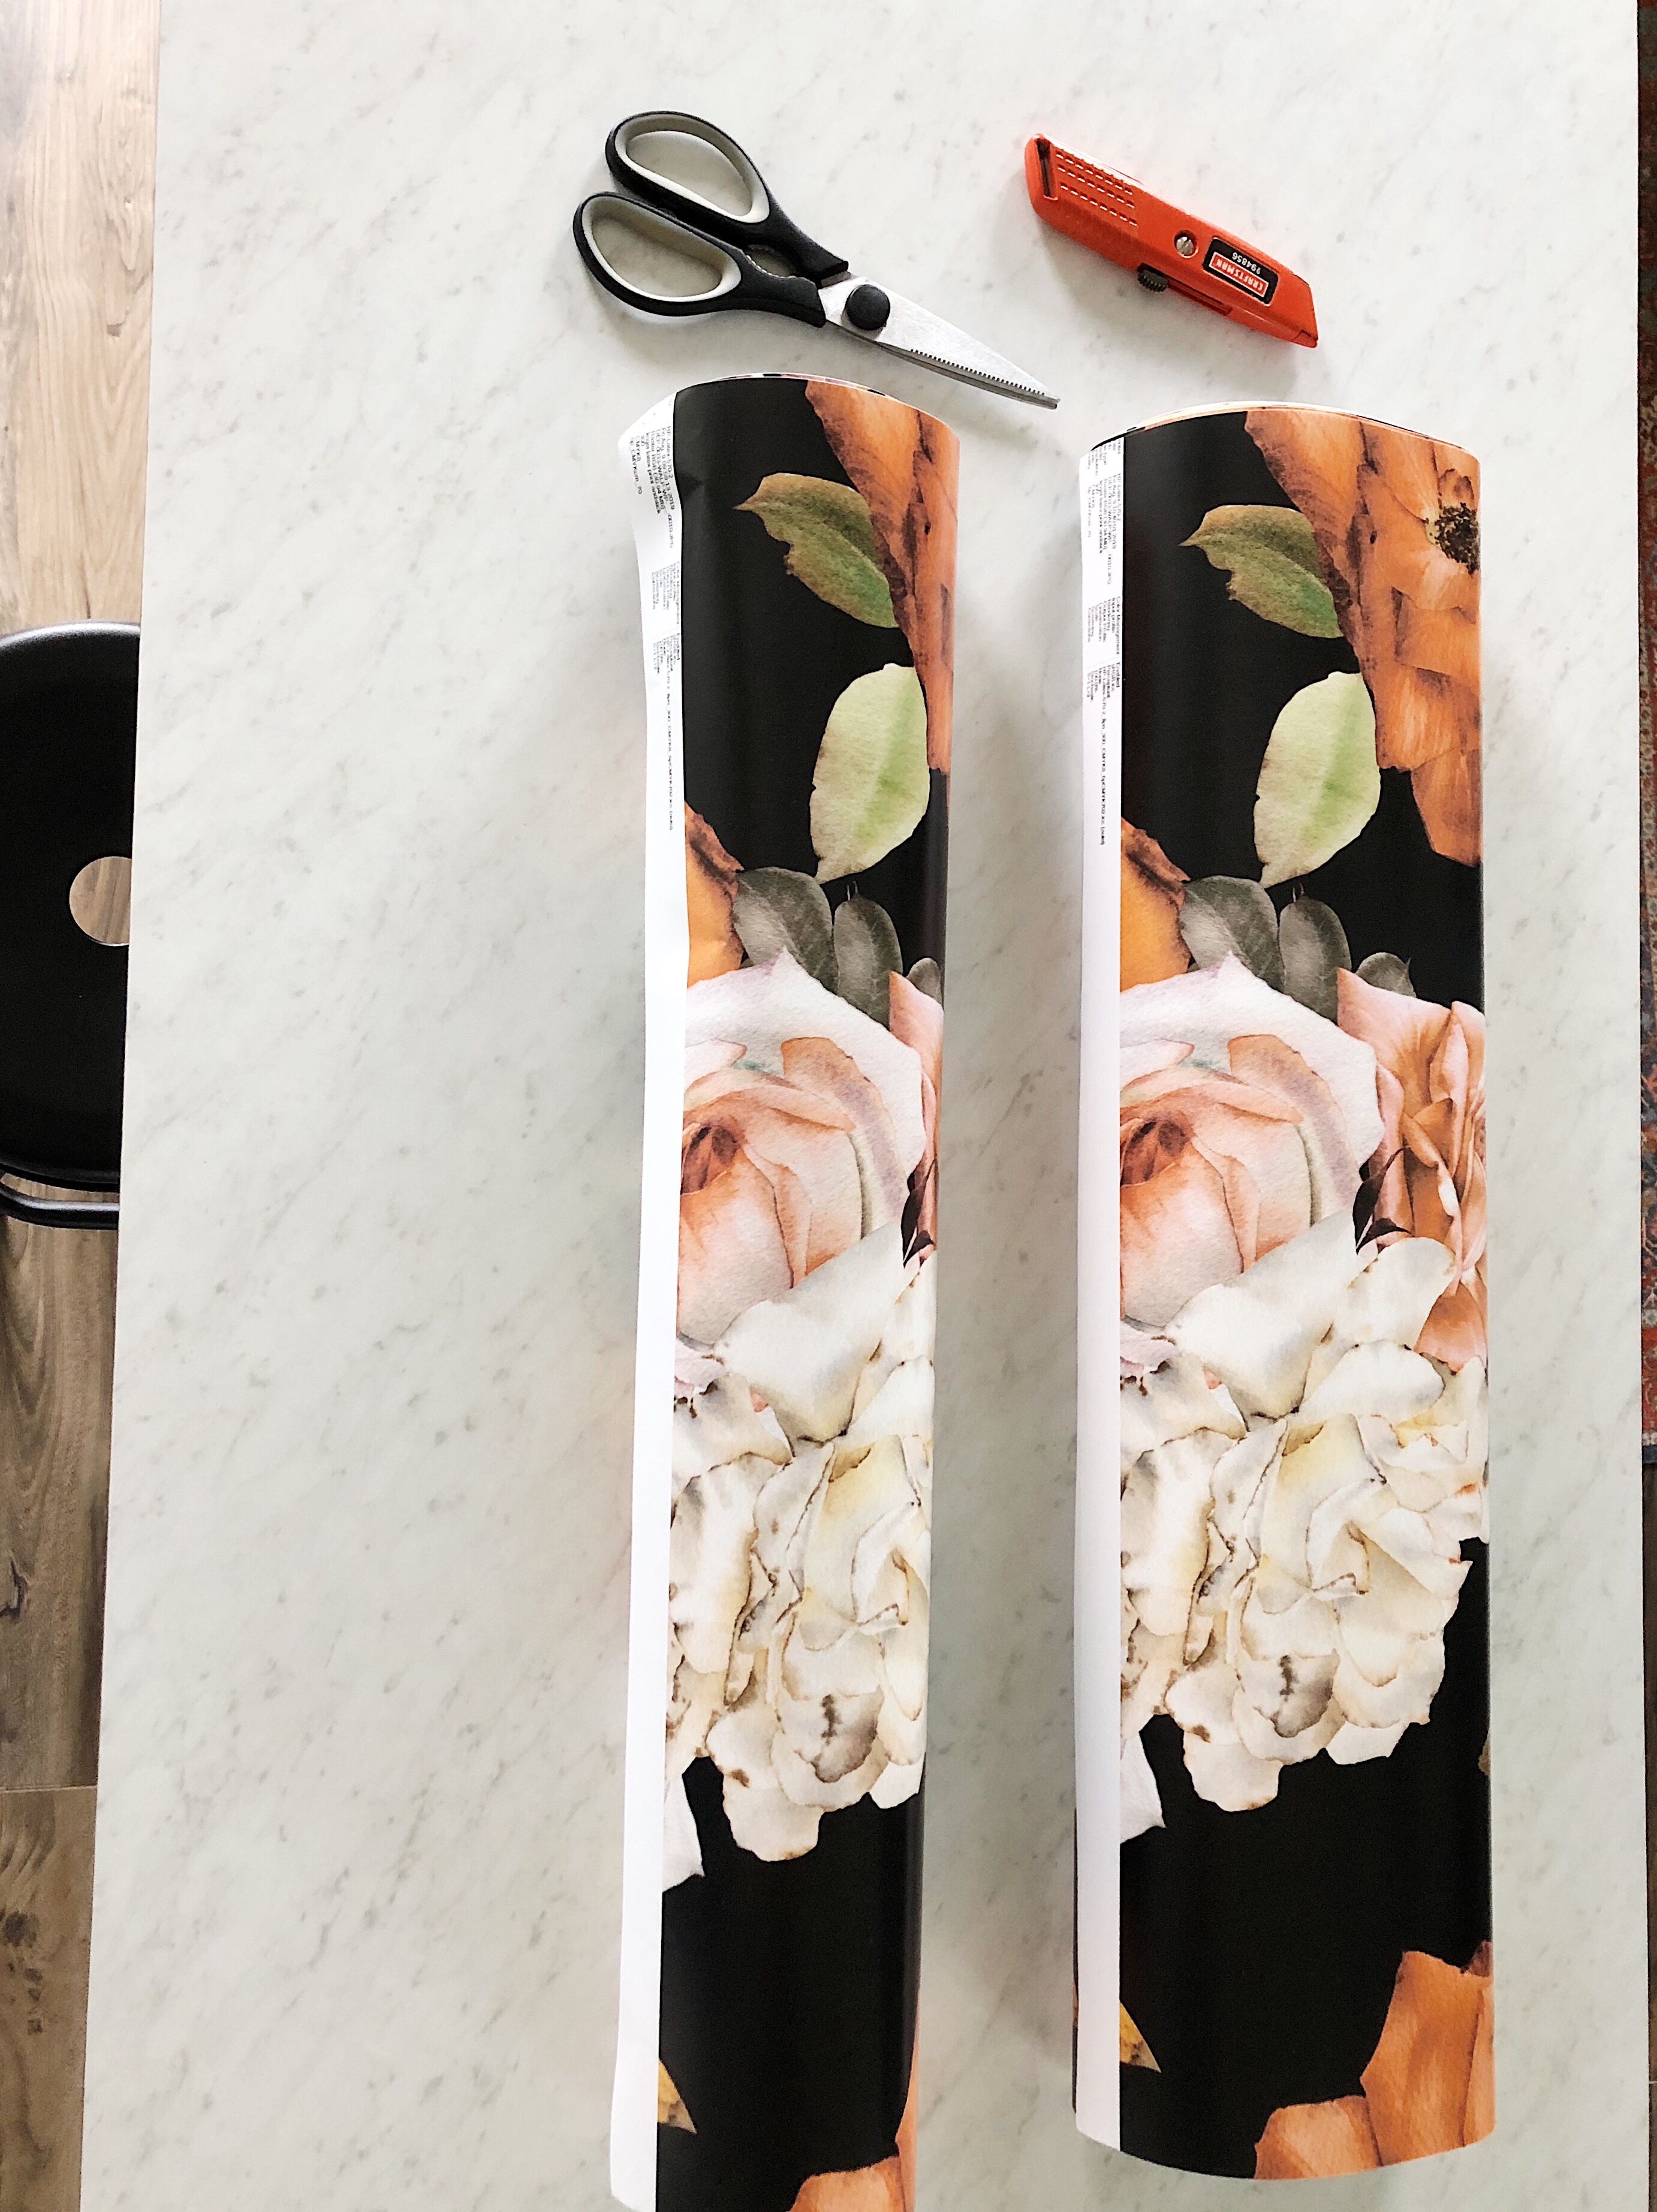
Alright, let’s get down to business. Here’s what you’ll need to design the wall of your dreams.
MATERIALS FOR PEEL AND STICK WALLPAPER PROJECT
-Ladder or chair (depending on your ceiling height)
-Sharp razor for trimming
-Level (may be helpful to ensure paper is straight)
-Smoothing tool (this is included if you purchase from WallsNeedLove)
STEP 1 – PREP
First things first, take everything off your wall. Use a damp cloth to clean the wall and then let it air dry. Once that is done, you’re ready to go!
STEP 2 – APPLICATION
You will start at the top of your wall and work your way down, making sure the rest of the wallpaper is laying straight at the bottom. It’s very important to make sure the wallpaper is straight on the wall when you start, this is where a level may be handy.
You will slowly peel the backing film to expose the sticky side of the wallpaper. Work in slow increments, I did only about 2 inch’s at a time. I would peel the film back two inches and then use my tool to lightly smooth it out. You DO NOT want to aggressively/firmly push the paper down to smooth it out, instead LIGHTLY smooth it out to prevent damage and imperfections to the paper that will be hard to fix if you have pushed too hard. If you notice there is a crease/imperfection, gently pull the paper back up and retry smoothing it out.


STEP 3 – TAKE YOUR TIME
****The trick with installing this wallpaper is to TAKE YOUR TIME. This is not a race people. Trust me, you will have a much better result and you will feel a lot better if you simply take your time and do it right the first time.****
Once you have one panel up you will take the next one and overlap it by about 1/2inch or however much you need to in order to match up your design. After all the panels are up, it’s time to use your razor blade to trim any areas of the wallpaper that need trimming. This can be multiple areas, i.e. bottom, baseboard, ceiling, and sides.

AND TA-DA, THAT’S IT!!! You now have a bomb new wall!! Small change, high impact! And the best part? When you get tired of it, simply pull back the wallpaper slowly with no hassle. 🙌🏼
Do your eyes a favor and install some of this in your own home!


If you’re interested in trying out peel and stick wallpaper in your own home, start at Walls Need Love. Click here and start the browsing! 😉
Thanks for stopping by!
Happy creating!
-Holly
