Bead Board DIY Makeover
Bead Board DIY makeover blog post is finally here! I’m loving how popular bead board is right now in the home DIY community! It’s aesthetically pleasing and really ups the cozy factor in any space! The clean lines and simple design, add just the right amount of accent to any wall.
As I was considering affordable options to add this beautiful accent within my own home, I found the price at Home Depot and Lowes to not be something I wanted to invest in at the moment. I also knew cutting the material would be more time consuming and the space I wanted to use the bead board in would require several cuts for electric outlets and windows. I wanted something easier, something cheaper.
Bead Board DIY Makeover Jackpot!
This is what led me on my hunt to find the most affordable bead board option! I discovered this amazing paintable, pre-pasted, 3D like BEAD BOARD wallpaper! JACK POT! The entire roll only cost $32 off amazon and I knew based off my square footage it would be plenty to cover the section of wall I wanted to use bead board on.
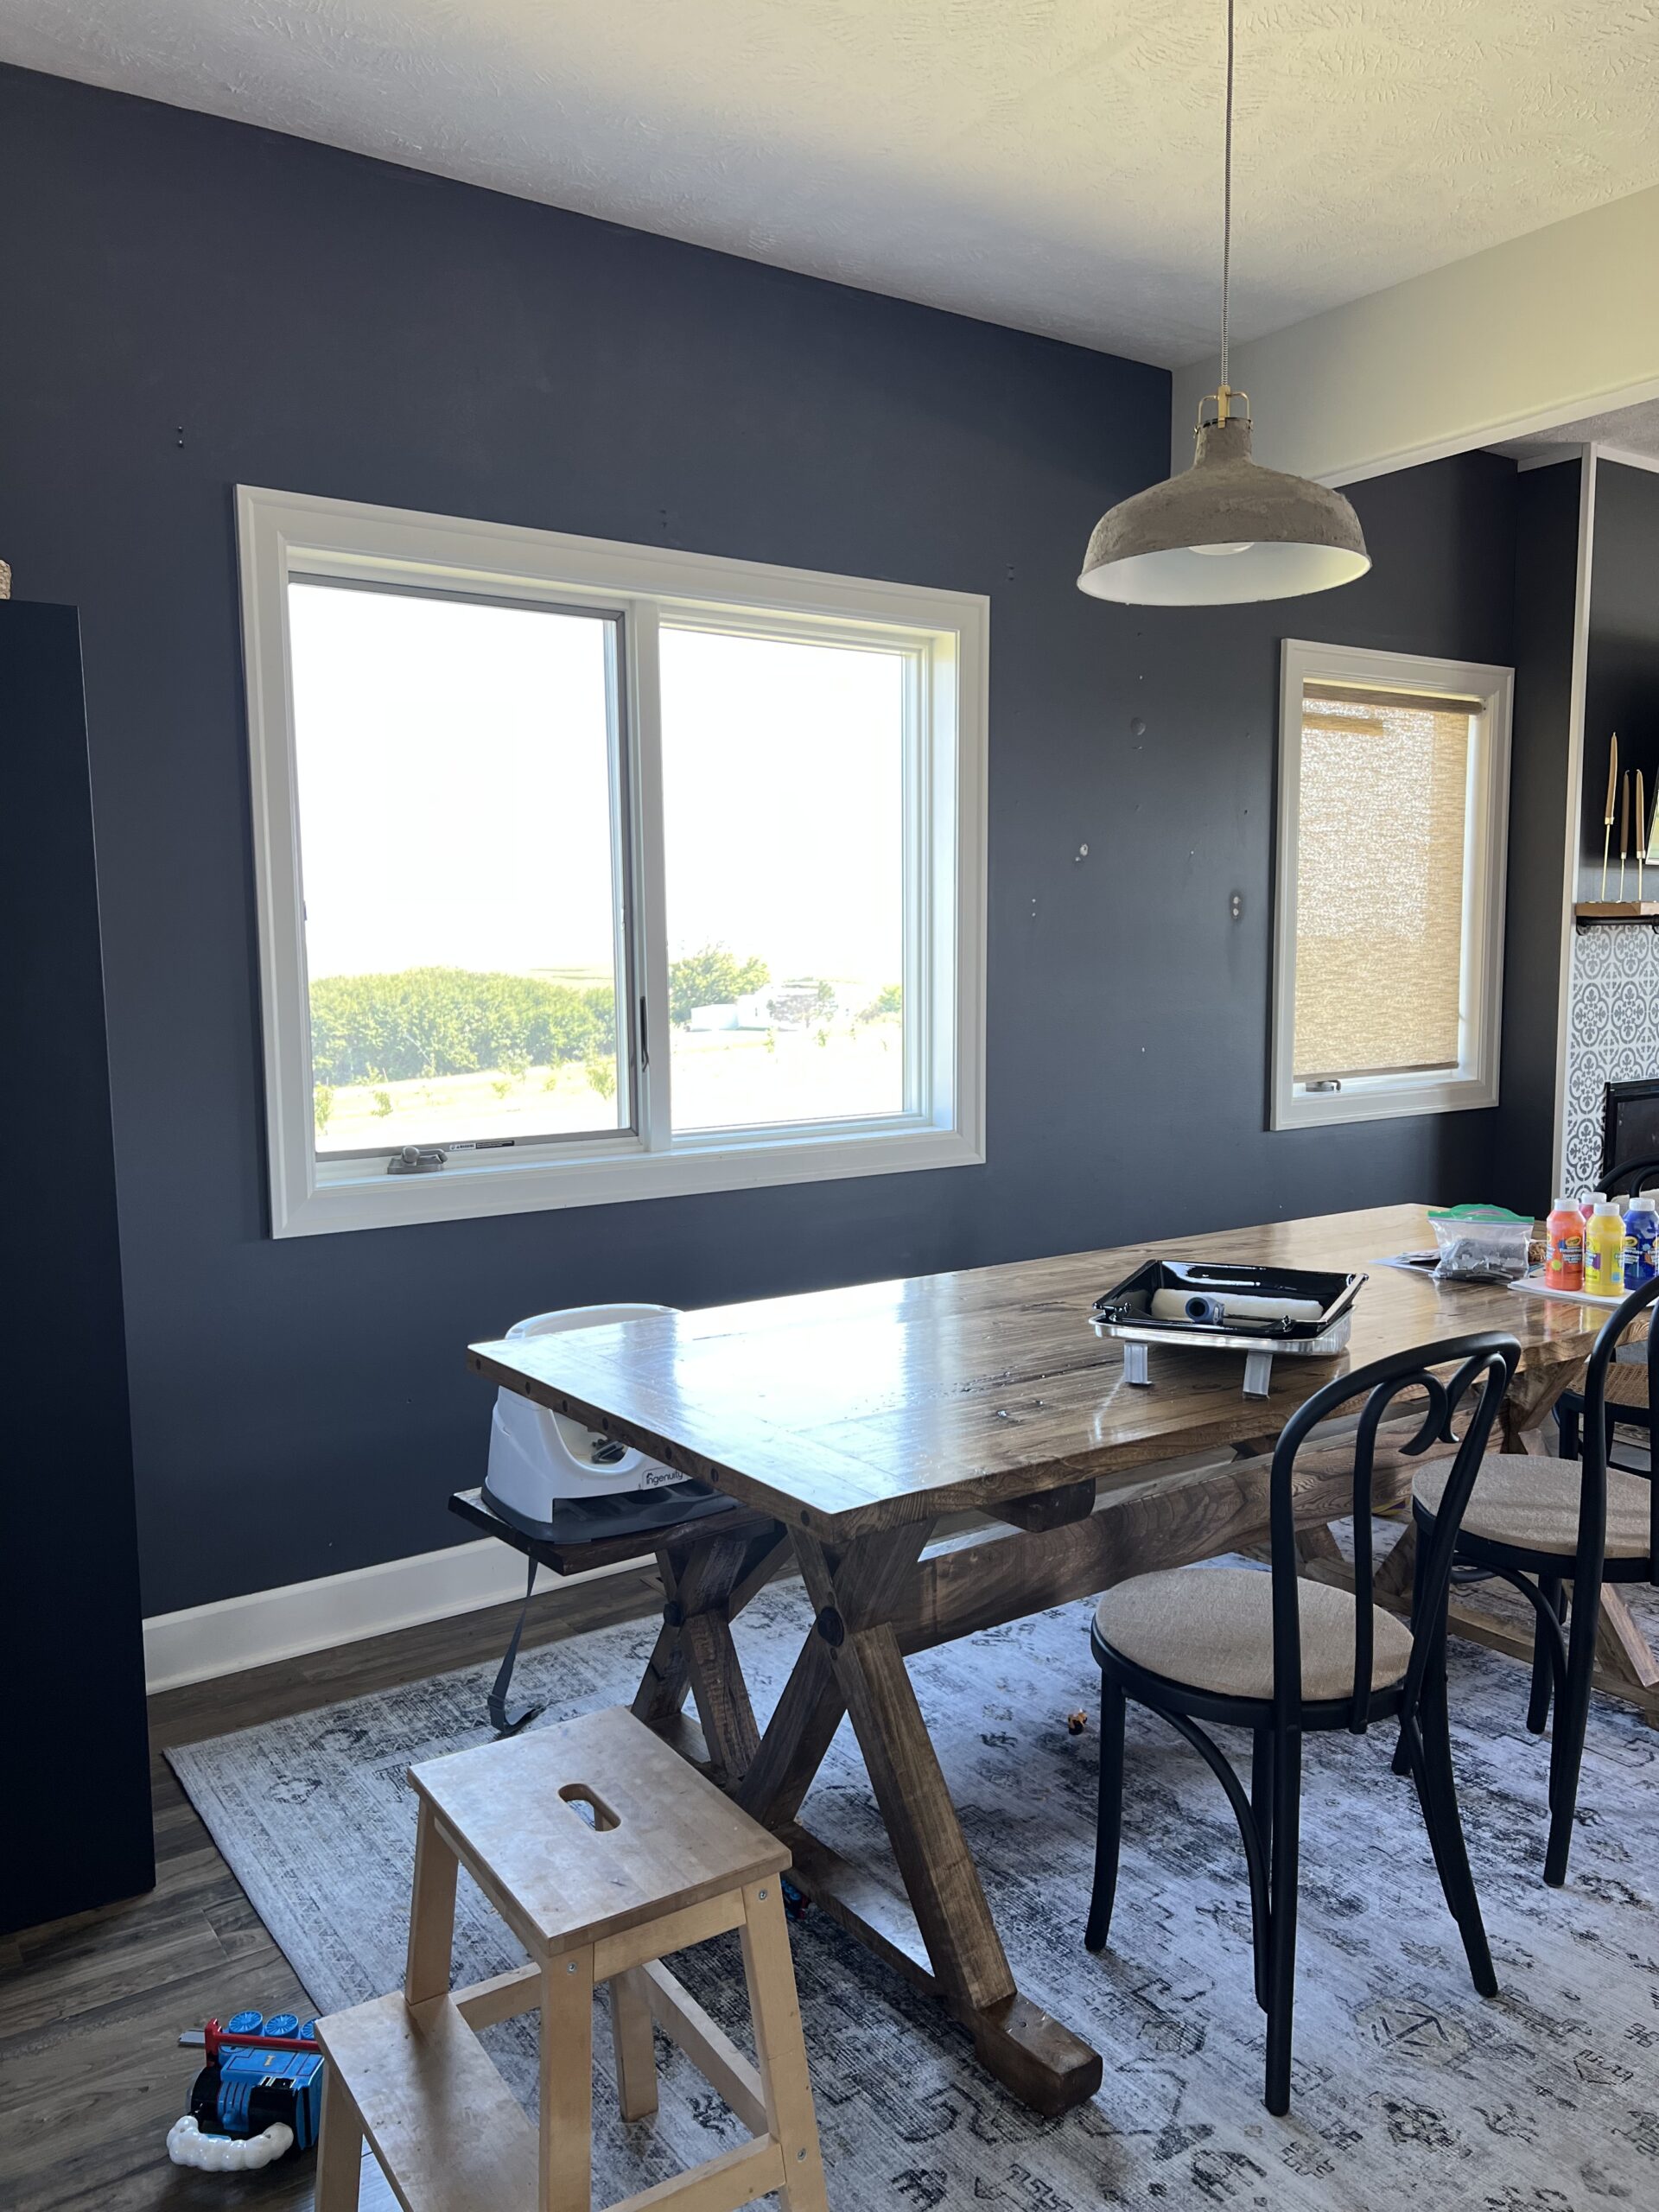
This is what the wall looked like before adding the bead board wallpaper.
This post may contain affiliate links, which simply means I may earn a small commission if you purchase from a link, at no additional cost to you. Thanks for supporting my blog, and if you have any further questions, you can see my disclosure here.
In this bead board DIY makeover blog post I’m giving you tips for installing this product and my honest opinion on using this bead board wallpaper.
Step 1: Prepping Your Wall
For my wall, I decided to apply the bead board only a quarter up the wall, maybe a little higher, but not quite half ways up the wall (see photos). If you’re planning to do the same, I recommend painting the top of your wall whatever color you’re wanting it to be before you start installing the bead board wallpaper.
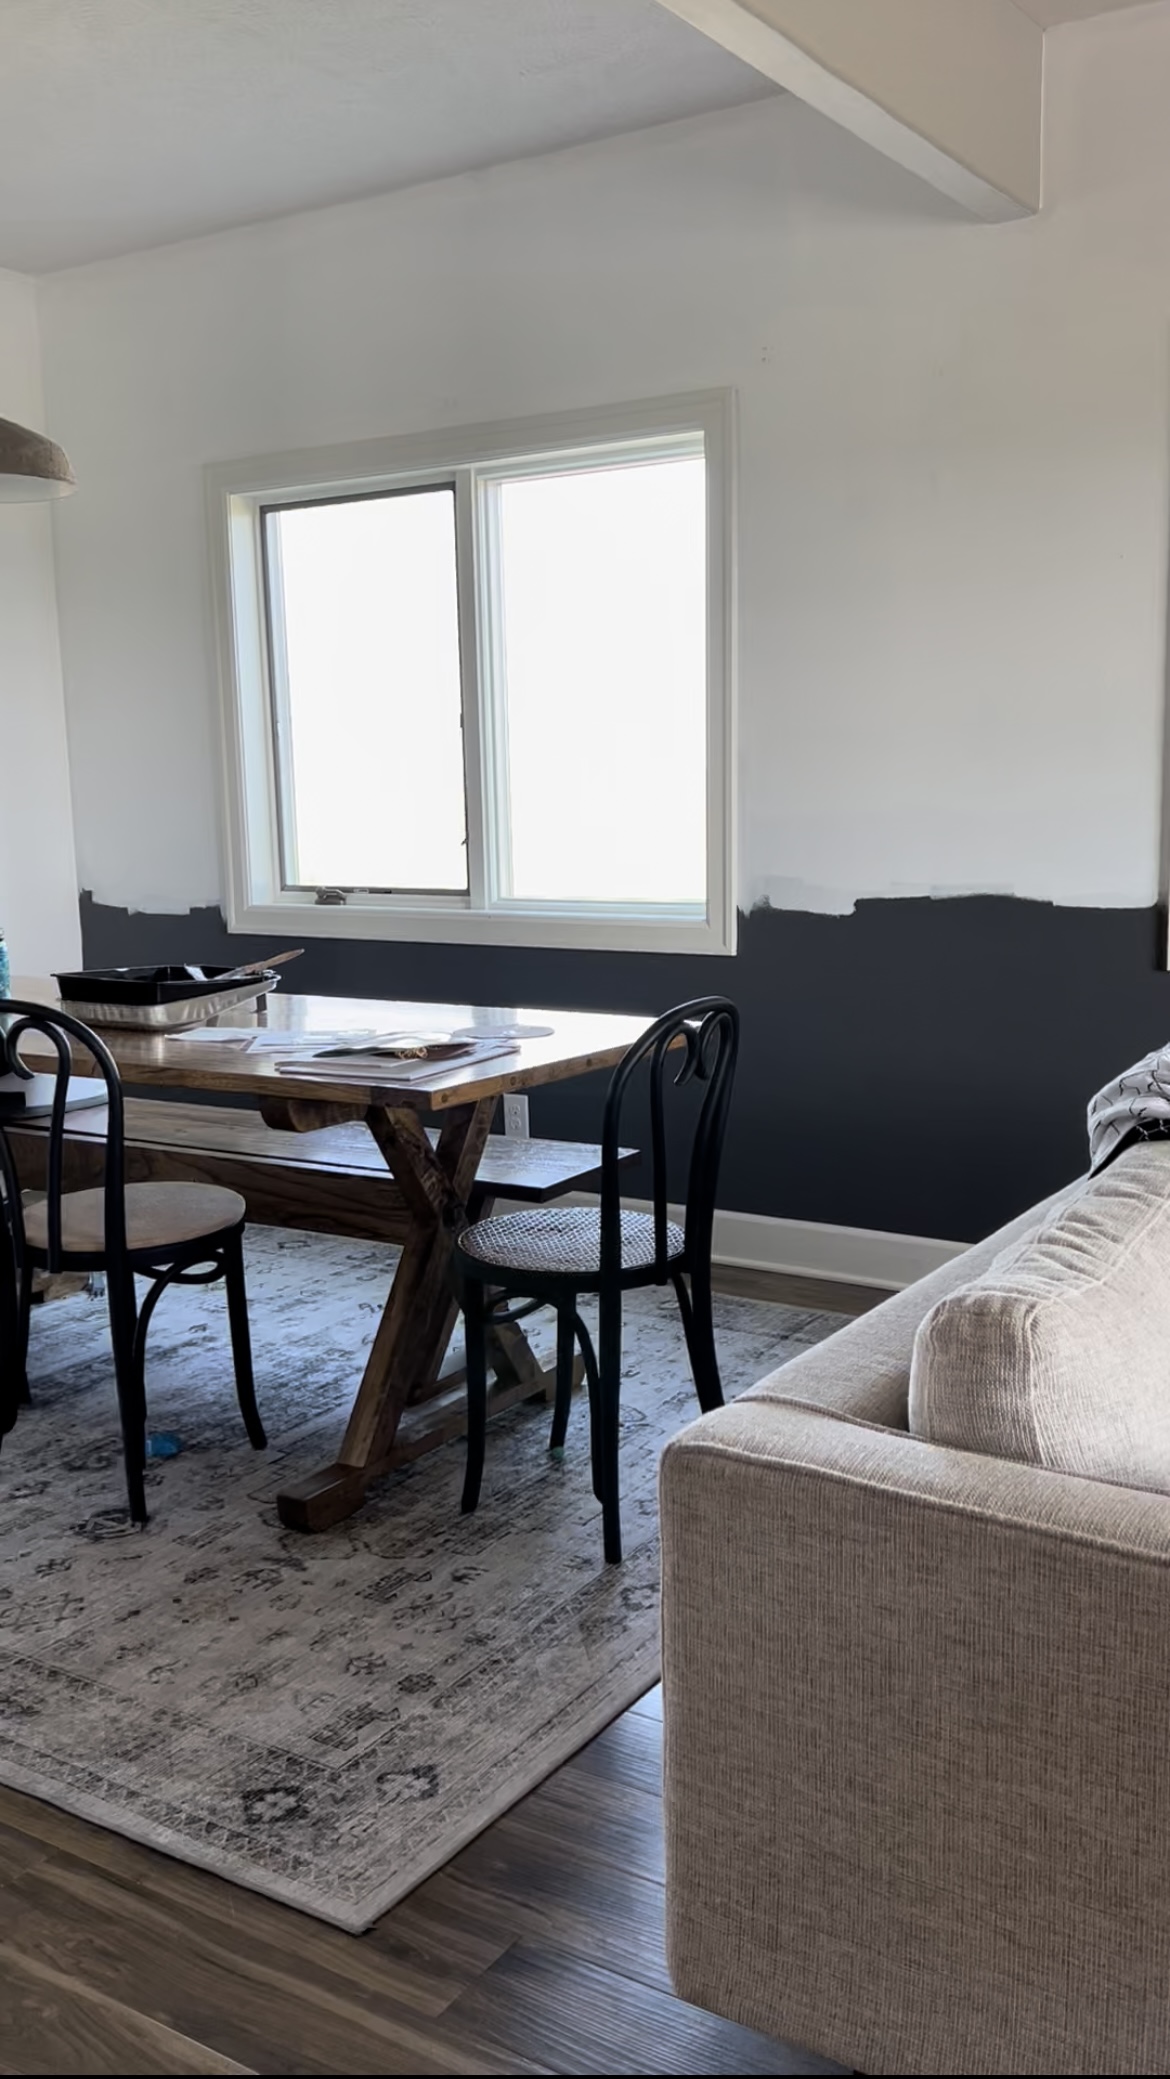
I first painted the top of the wall white before adding bead board to the lower half.
As far as addressing the section you will be installing the bead board wallpaper to, I’d recommend removing outlet covers and repairing any parts of the wall that may need it. If you have small nail holes or just small imperfections in your wall, those should be fine. But if your wall is quite damaged or has big holes, I’d repair those first. I would also make sure your wall is nice and clean before starting to apply wallpaper.
Step 2: Cutting Your Panel to Length
Installing the bead board wallpaper was not complicated, but it did require some skill and practice. What I did first was measure the height of my wall to figure out how long I needed each panel to be. Once I figured that out, I measured the wallpaper and cut my panel to size. Instead of cutting them all at one time (which could potentially save you time), I decided to take things slow and steady. I only cut out one panel at a time. I also had window frames to go around, so not all of my pieces were the same length.
Step 3: Activating Pre-Pasted Panel for Installing
Now that I had my first panel cut I followed the directions the wallpaper came with, quite closely. The panels are all pre-pasted which means you don’t need to go out and buy wallpaper paste and try to apply it on the panel yourself. I really loved that about the wallpaper. Instead, you just need to get the entire back of the panel wet to activate the paste. I found the best approach for getting the back of the panel wet was to simply fill our bath tub with a shallow amount of water. I then laid the entire panel in the tub for 30 seconds.
After it had soaked for 30 seconds I removed it CAREFULLY by lifting from the corners straight up and out of the tub. I then put the panel down on a dry towel and folded the pasted sides into the center of the panel. Let the panel sit like this for 5 minutes before applying it to the wall.

Pasted sides of panel should fold to middle like pictured.
WARNING! Once the product is wet, it does become very fragile and will tear easily. That is why you must be careful when you are handling it. You will get the hang of it once you do more panels though, no sweat.
Step 4: Applying Wallpaper To Wall
After your panel has sat for 5 minutes it’s finally time to apply it to the wall. I would recommend having several dry towels on the floor because there will be A LOT of paste that comes off when smoothing it out onto the wall. For smoothing it out onto the wall, I worked from the top down in small sections. I would start on the right side and smooth it out from the top all the way down to the bottom and work my way over, always starting at the top. This wallpaper really smooths out easily and I didn’t find it difficult to work with at all, as far as smoothing it out goes. I’d recommend just using your hands or a damp sponge to smooth it out. You don’t want to use anything that is sharp because the paper will easily tear. It’s also nice to have a damp sponge for removing excess paste.
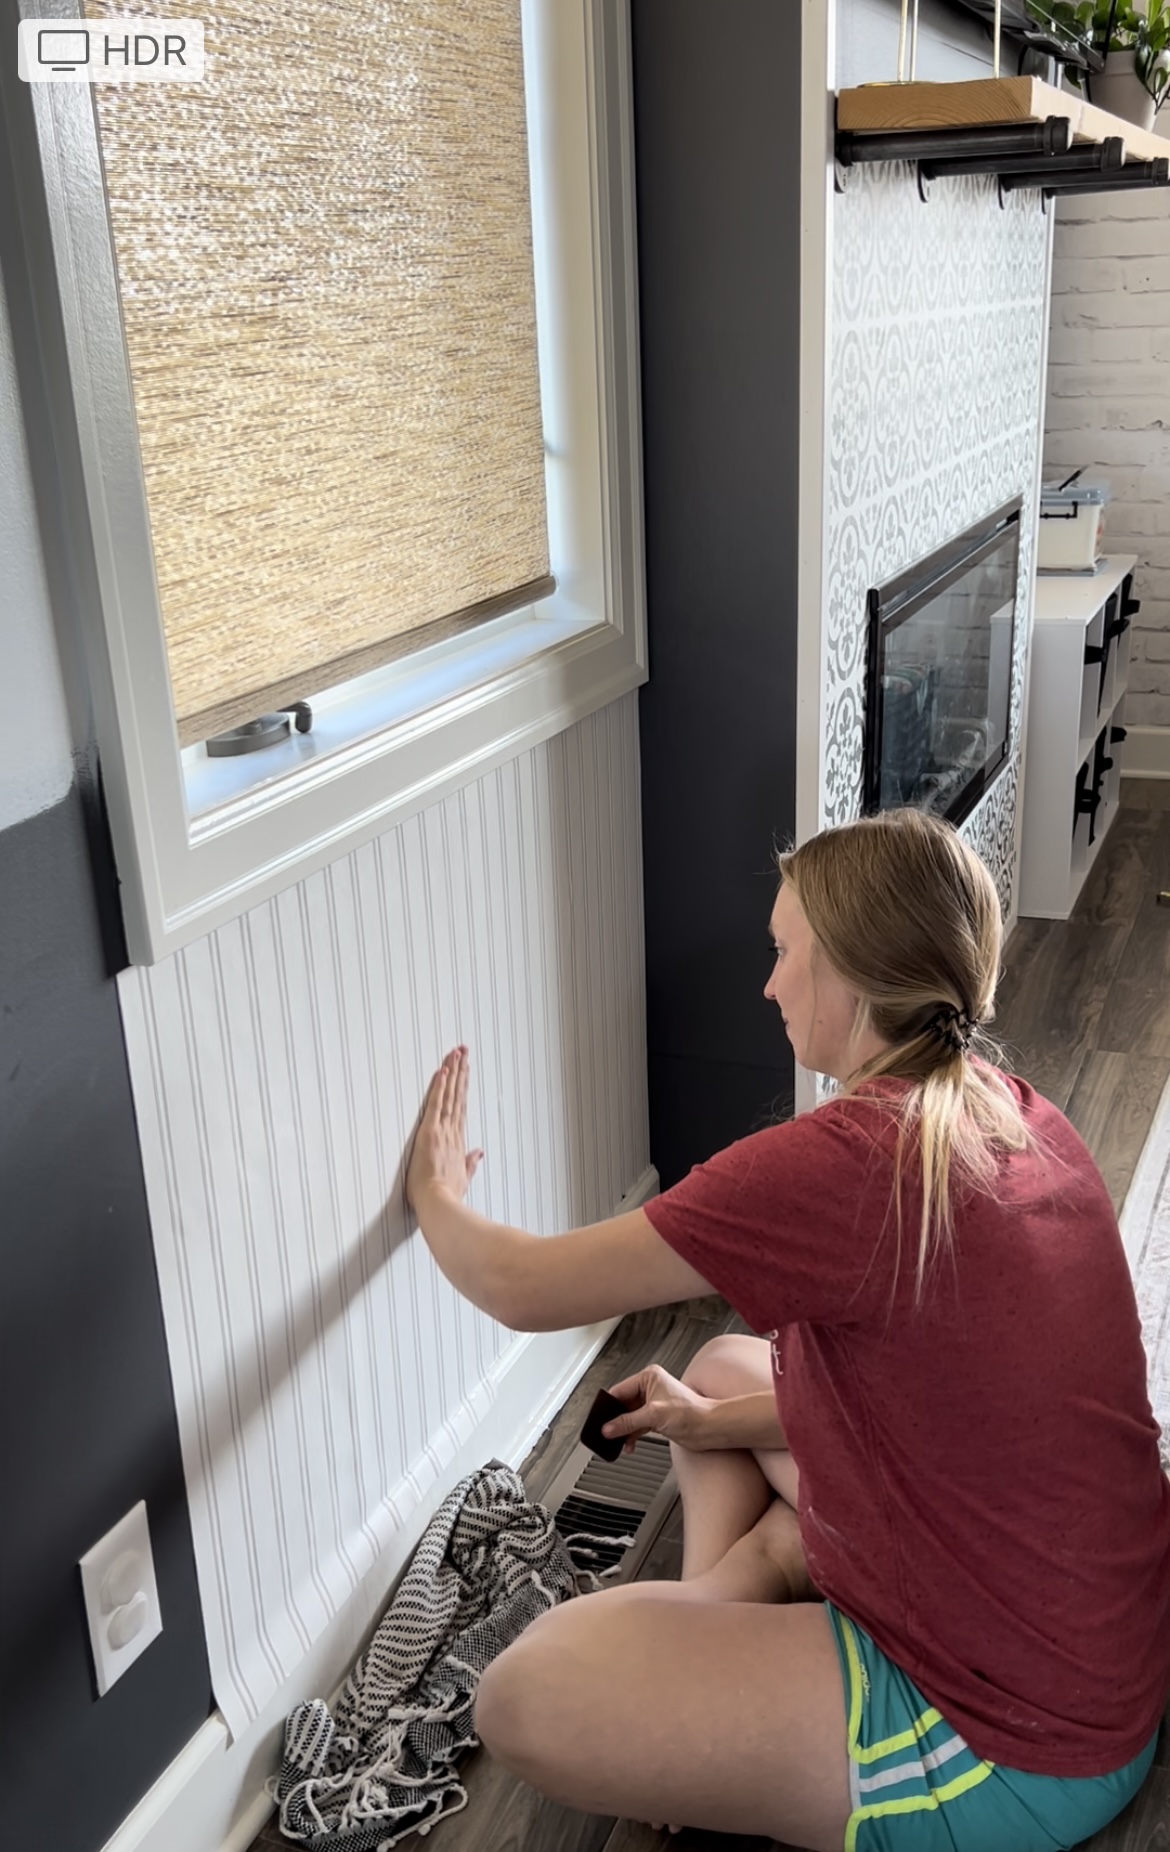
Smooth out wallpaper with hands, sponge or any other non sharp tool.
Step 5: Cutting Excess Wallpaper
Once you have your first panel up you can literally just repeat steps 2-4. You do not need to overlap the panel at all, instead they should just butt up to each other. Make sure you get them as close together as you can, but do not overlap.
For removing excess paper that will often accumulate on the bottom and when going around objects, like windows and outlets, I used a very sharp (brand new) razor knife and my putty knife. See photo for visual. This seemed to work the best. Make sure you are taking your time!

Use your putty knife as pictured and your razor knife to remove excess paper.
Step 6: Adding Trim Piece To Top and Using Spackling for Repairs
We are getting so close to the finishing touches now! You have all your panels up and have cut off all excess paper. The next thing I did was to apply a small piece of trim to the top. This gave the bead board wallpaper the finished look it needed! You can really use any piece of trim you like for this. I purchased a very inexpensive piece from Home Depot and cut it to size using my miter saw. I used a small level and my cordless brad nailer to install the trim. These two tools are truly some of my favorite! If you are beginner DIY’er, interested in mostly beginner DIY home projects, these tools are a must!
Adding trim piece to the top of the wallpaper.

Lastly, I took some dry dex spackling to fill the nail holes on the trim. Once dried, I lightly sanded until smooth. You can also easily apply spackling to any areas that might need it on the actual wallpaper itself. If you have small tears or a dent in the paper anywhere from installing it, simply apply a small amount of spackling and it will work wonders! I did this on many areas at the the bottom of the wall where I had trimmed the wallpaper and small tears had happened. If you have small spaces between your panels, you can also use spackling to fill.
To apply spackling, I just used my fingers, I would not recommend using anything sharp like a putty knife. Once dry, lightly sand and you’re ready to start the next and final step!
Step 7: Painting The Bead Board Wallpaper
You have made it to your last step! The wallpaper directions recommend waiting 24 hours after installing before you paint. I decided to paint the entire section with a brush because I was out of rollers and the section was really not that large. If you use a roller, you will also need to also use a brush to get the smaller areas you can’t get with a roller.
The paint options are endless nowadays, I ended up mixing two paint colors to get the look I was wanting. I did a 60/40 mix of Farmhouse Beige by JoliePaints with the color Algonquin by Fusion Mineral Paint.
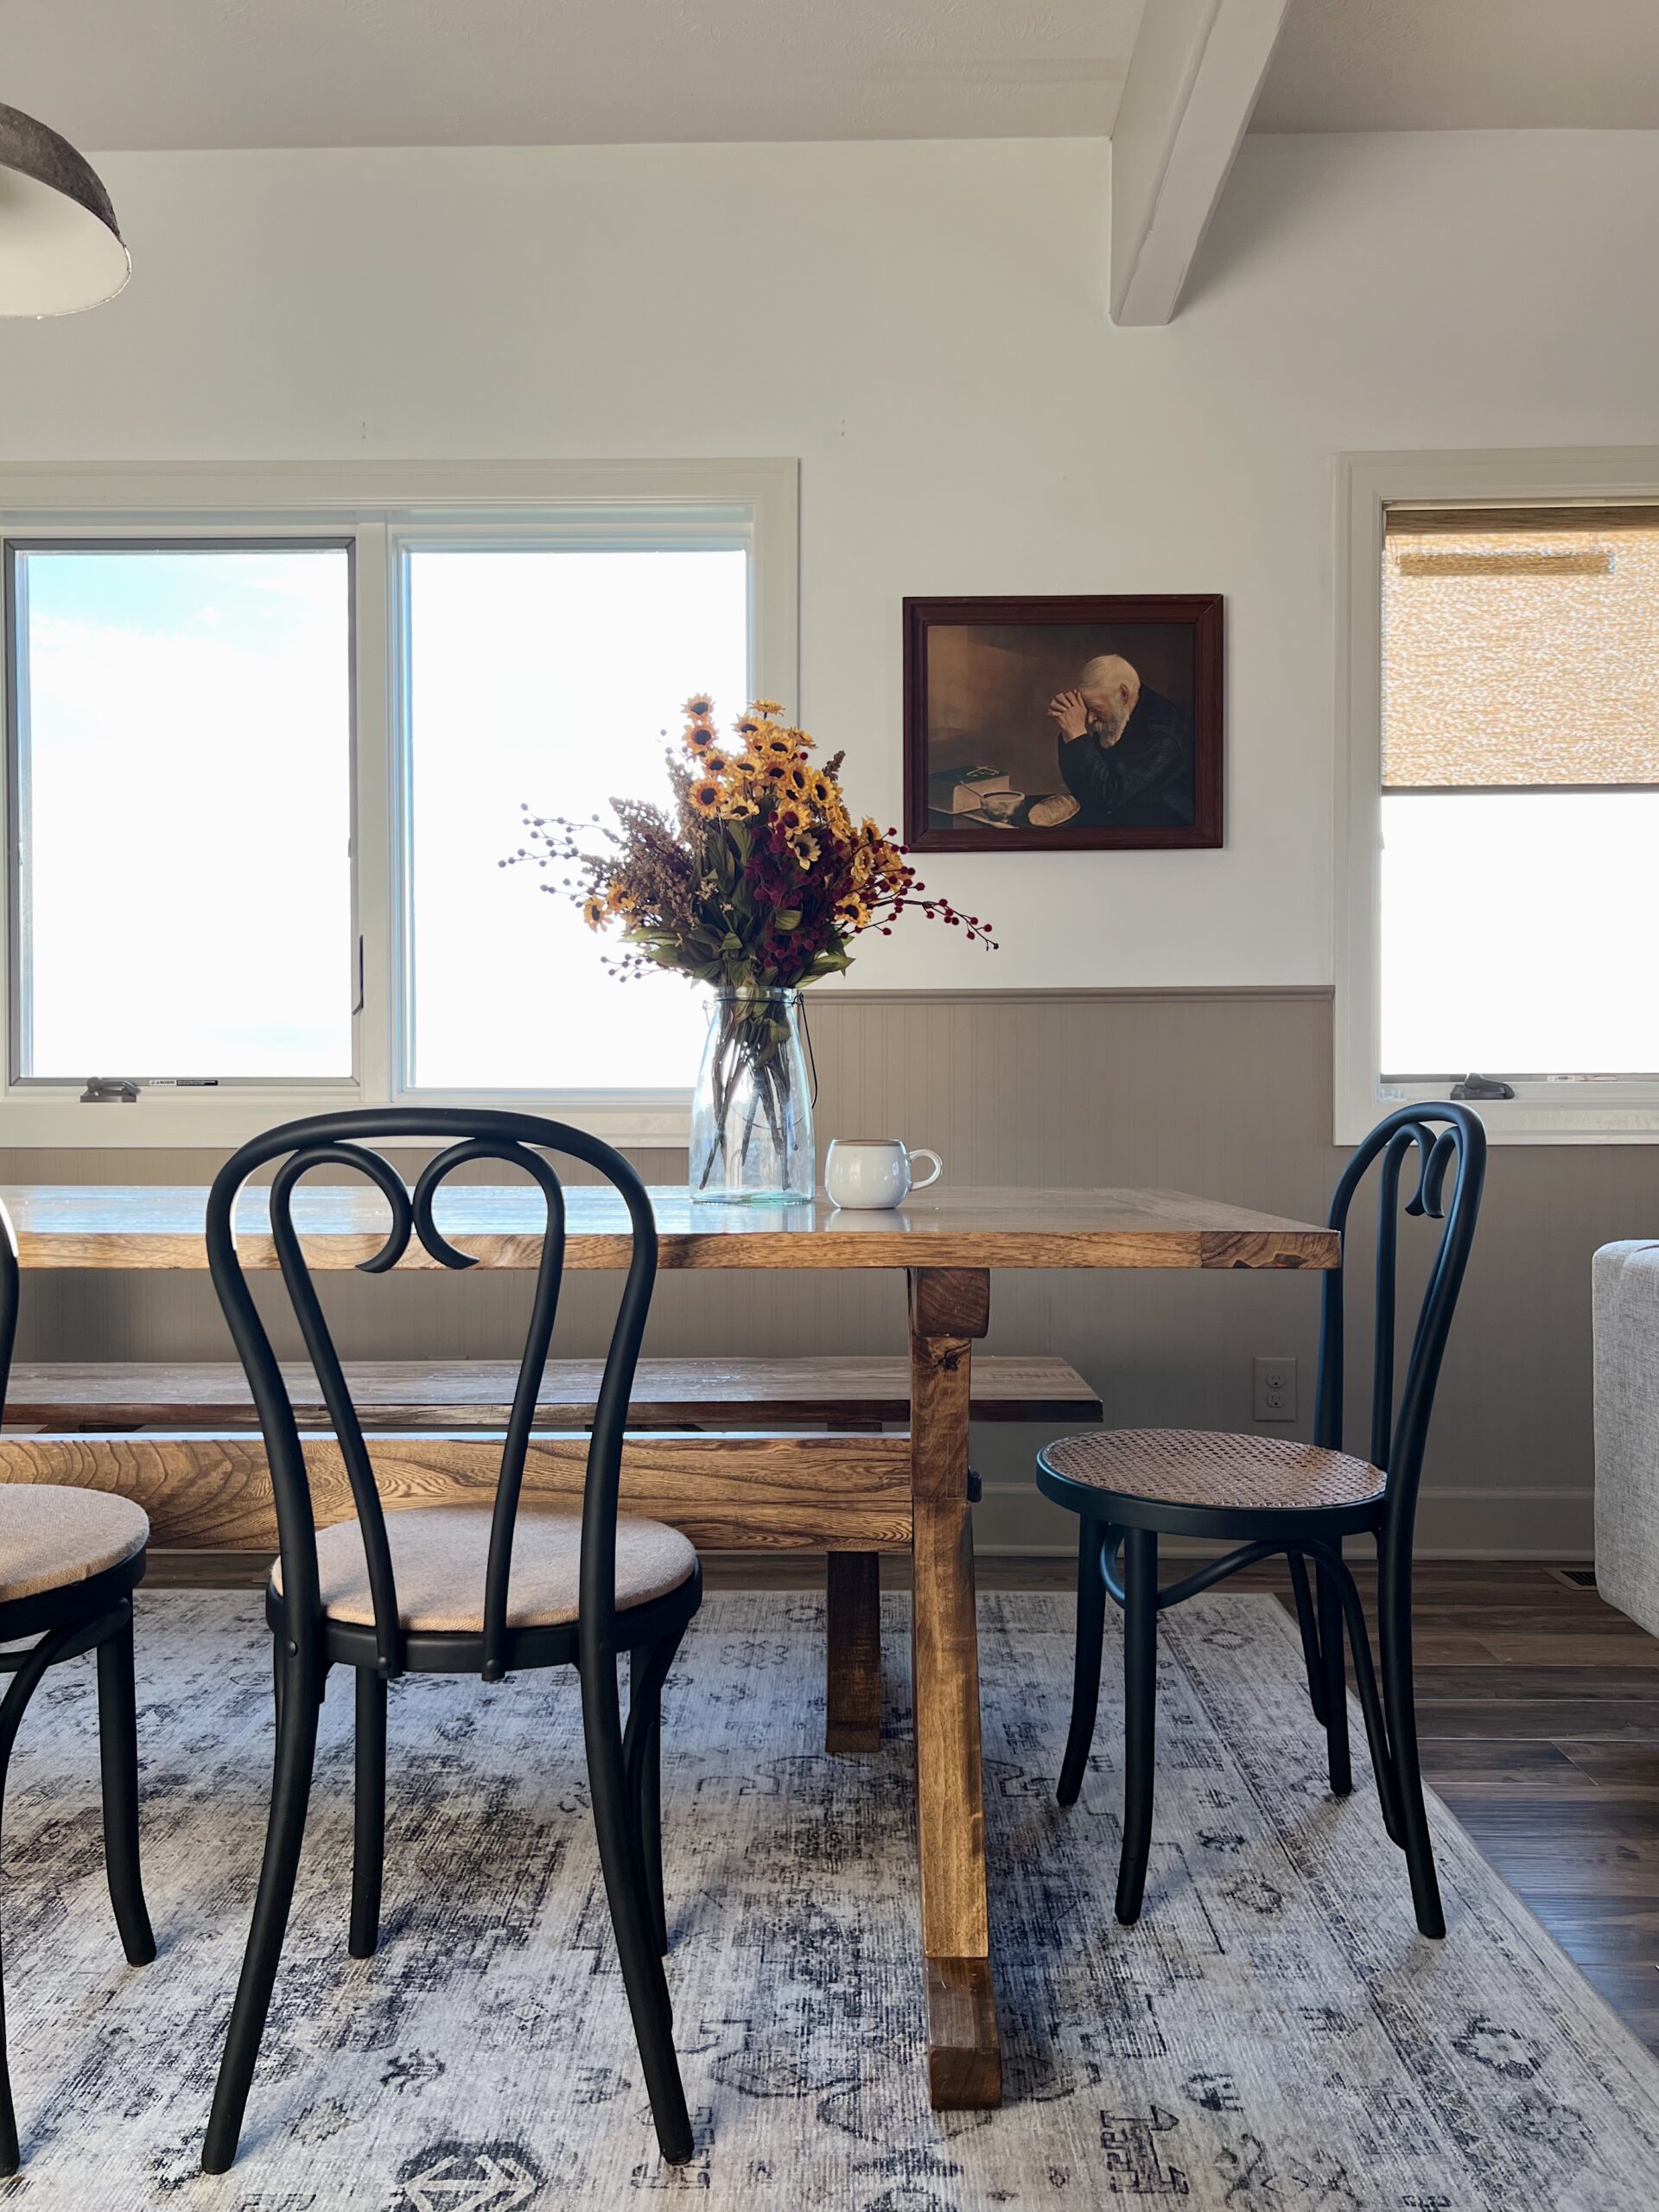
The finished wall turned out better than I imagined it would!

Additional Tips for Installing Wallpaper and My Honest Opinion
Overall, for the price and look of this bead board wallpaper (it truly looks sooooo real), my honest opinion is that I would definitely use it again within my own home!
My main tips are this, I would recommend having at least 4 dry towels for clean up and a damp sponge to remove excess paste from wall. I really can’t stress enough how shocked I was at how messy the excess paste was! I also CANNOT STRESS enough the importance of handling the paper with care once it is wet. The paper becomes very fragile and tears quite easily. You Must use a VERY SHARP razor knife and your putty knife for trimming!
I hope this bead board DIY makeover blog post was helpful! As always, if you have any questions, leave a comment below, send me an email or DM on my Instagram! If you’re interested in seeing these projects in real time, follow along on Instagram and tune into my stories!
Thanks for stopping by and supporting my blog!
Happy Creating,
Holly